

Moka Pot Grind Size: Dial In Medium-Fine for Balance
The right moka pot grind size is medium-fine, noticeably finer than what you’d use for drip coffee but coarser than espresso. Think fine sand or table salt rubbed between your fingers. This texture creates enough resistance for the moka’s low-pressure brewing (roughly 1 to 2 bars of steam) without choking it the way an espresso-fine grind would.
If your grinder has multiple settings, start in the middle range and adjust from there. On a Bialetti Moka Pot or similar stovetop brewer, that starting point usually gets you close on the first try.
A few rules to lock in before you touch the grinder:
- Do use a burr grinder for even particle size.
- Don’t tamp the grounds. Moka pots aren’t built for that kind of resistance, and tamping can stall the flow or push pressure somewhere it shouldn’t go.
- Do fill the basket level and let it sit loose and fluffy.
Key Takeaways
The ideal moka pot grind is medium-fine, and hitting a 4 to 6 minute brew time with small, single-variable adjustments is what actually gets you there consistently.
| Point | Details |
|---|---|
| Start medium-fine | Aim for a fine sand or table salt texture, finer than drip, coarser than espresso. |
| Watch your brew time | Target 4 to 6 minutes total; under 3 means too coarse, over 7 to 8 means too fine. |
| Adjust one click at a time | Change grind in small increments and alter only one variable per test brew. |
| Scale grind with pot size | Smaller 3-cup pots often want a finer setting than larger 6-cup and up models. |
| Use a burr grinder, never tamp | Uniform particles matter more than force; tamping can stall flow or spike pressure. |
| Try Font-mag’s fresh beans | Freshly roasted coffee from Font-mag gives your dialed-in grind more room for error. |
Table of Contents
- How to Dial in Your Moka Pot Grind Size
- Reading the Cues: Bitter, Weak, or Just Right
- Adjusting Grind for 3-Cup vs. 6-Cup Moka Pots
- The Gear That Actually Matters
- The AeroPress Filter Trick for Cleaner Coffee
- Quick-Reference Cheat Sheet
- Better Beans Make Dialing In Easier
- Frequently Asked Questions
- Sources
How to Dial in Your Moka Pot Grind Size
Finding your ideal setting takes maybe three or four brews if you’re methodical about it. Here’s the sequence that works.
- Weigh your dose. Fill the basket to the rim without pressing down. For a standard 3-cup Bialetti, use an appropriate dose that fills the basket to the rim without pressing down.
- Fill the water chamber to the valve line, using water just off the boil (this shortens brew time and reduces the chance of scorching the grounds).
- Set your grinder to the starting point (medium-fine, fine sand texture).
- Brew on medium heat with the lid open, so you can watch the flow.
- Time the whole process from when you put the pot on heat to when the flow slows to a trickle and starts to sputter.
- Taste and record. Note the flavor, the flow pattern, and the total time.
Your target brew time window is about 4 to 6 minutes total, from heat to gurgle. A steady, honey-colored stream that gradually lightens is what you want. Violent sputtering right out of the gate or a thin, fast squirt both signal a problem.
The most important habit here is what coffee people call the one-click rule: adjust your grinder in small increments, one or two settings at a time, and change nothing else between brews. Move the heat, the dose, and the water temperature all at once, and you’ll never know which variable actually fixed (or broke) the cup.
Pro Tip: Keep a running log on your phone, even a simple notes app works. Track grinder setting, dose, heat level, brew time, and a one-line tasting note. After four or five entries, patterns jump out that you’d otherwise miss.
Your brewing log doesn’t need to be fancy. Just capture:
- Grinder setting (the number or click position)
- Dose in grams
- Heat level (low, medium, medium-high)
- Total brew time
- One tasting note (bitter, flat, sweet, balanced)
Reading the Cues: Bitter, Weak, or Just Right
Your moka pot is telling you something with every brew, you just need to know what to listen for.
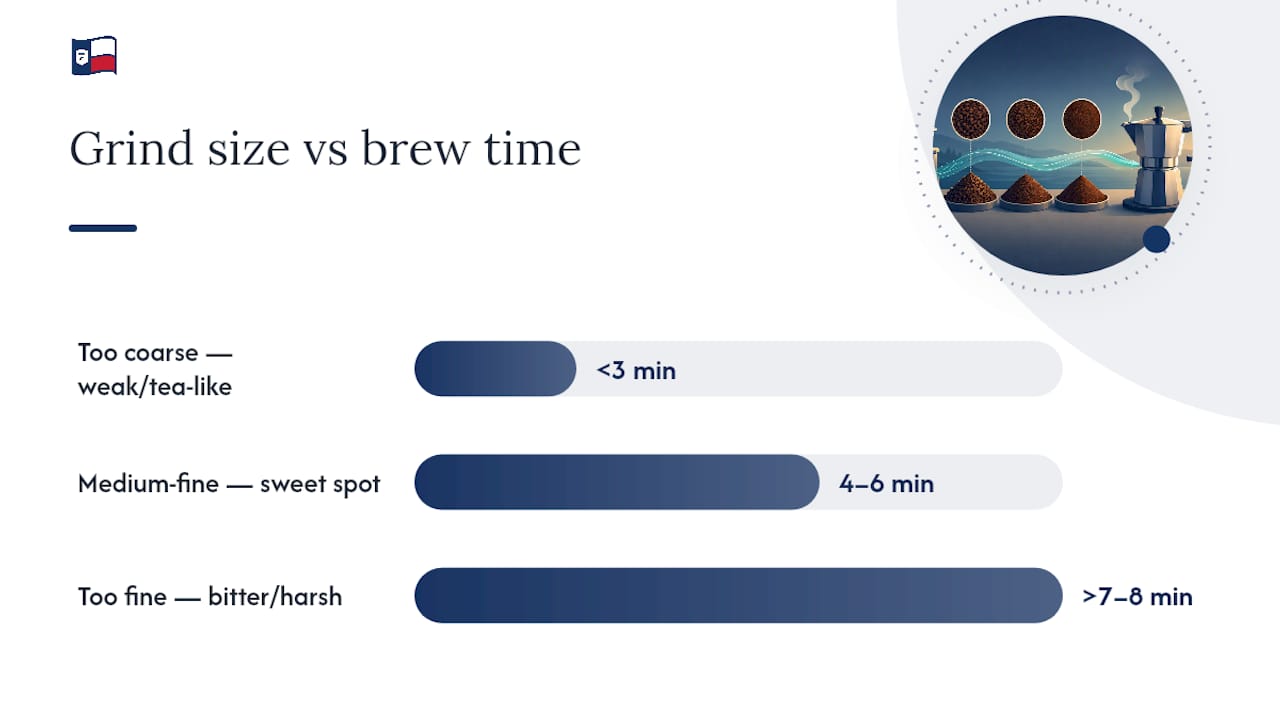
Bitter, harsh, or ashy coffee almost always means the grind is too fine. The water is spending too long in contact with the grounds, pulling out compounds that taste unpleasant rather than sweet. Fix: go one or two clicks coarser next time. Nothing else needs to change first.
Weak, thin, or tea-like coffee points to the opposite problem: too coarse. Water is rushing through with barely any resistance. Fix: one or two clicks finer.
Brew time backs up both diagnoses. Under 3 minutes means the grind is letting water through too fast. Between 4 and 6 minutes is the sweet spot. Past 7 or 8 minutes, you’re almost certainly dealing with a grind that’s too fine, or a stove turned up too high.
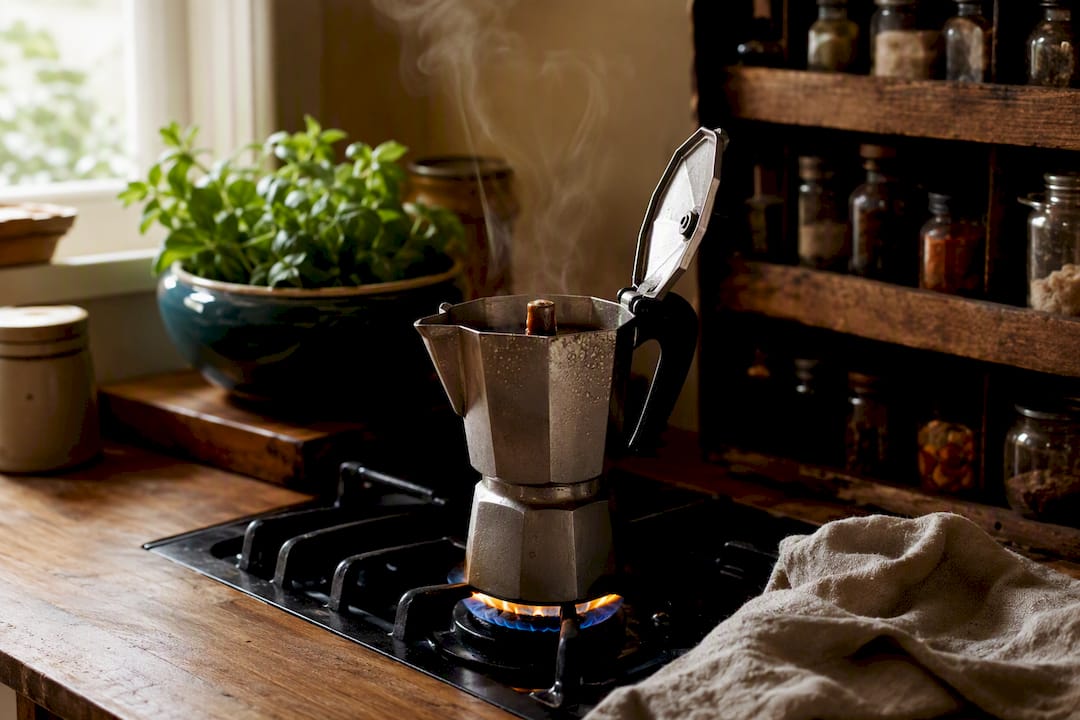
Watch the pot while it brews, too. A calm, steady stream that gradually turns lighter and more golden is normal. Loud sputtering and spitting early in the brew usually means the grind is too fine and pressure is building faster than it can escape smoothly. A thin, quick, watery stream from the start usually means too coarse.
Before you blame the grind entirely, rule out two other culprits: heat that’s too aggressive (which speeds up extraction regardless of grind) and beans that have gone stale, since stale coffee often tastes flat no matter how well you dial in the setting.
Adjusting Grind for 3-Cup vs. 6-Cup Moka Pots
Moka pot size changes the math slightly. Smaller pots, the classic 1 to 3 cup Bialetti-style brewers, often do better with a grind on the finer edge of medium-fine, since the shorter brewing path and smaller coffee bed need a bit more resistance to hit that 4 to 6 minute window.
Larger pots, 6-cup and up, tend to want a touch coarser. More coffee mass and a bigger basket change how water moves through the bed, and a grind that worked perfectly on your 3-cup can run slow and bitter once you scale up.
- 3-cup: typically a dose sized to fill the basket without tamping, medium-fine, toward the finer side.
- 6-cup: roughly double the 3-cup dose, medium-fine, possibly slightly coarser.
- 9-cup and larger: scale the dose proportionally and adjust grind coarseness as needed if brew time is too long.
If you’re moving up in pot size, don’t guess. Start one or two clicks coarser than your dialed-in small-pot setting and run the same test-and-log process again.
The Gear That Actually Matters
A burr grinder is the single biggest upgrade you can make if you’re currently using a blade grinder. Blade grinders chop unevenly, leaving a mix of dust and chunks in the same batch, which means part of your coffee is over-extracting while another part is under-extracting at the exact same time. A burr grinder produces uniform particles, so the whole bed extracts at roughly the same rate.
For translating vague grinder dials into something usable: on a typical 1 to 30 or 1 to 40 stepped grinder, moka pot grind usually lands in the lower-middle third, and that setting corresponds to a particle size around 300 to 500 microns, compared to roughly 100 to 300 microns for espresso and 500 to 700 for drip. That range gives you a real target instead of a vague description.
Beyond the grinder, keep your setup simple:
- A basic kitchen scale for consistent dosing.
- A timer (your phone works fine).
- Fresh whole beans, ground right before brewing, since pre-ground coffee loses aroma and consistency within days.
- A few AeroPress paper filters on hand for the sediment trick below.
Pro Tip: Grind immediately before brewing, not the night before. Ground coffee starts losing its best aromatics within thirty minutes of exposure to air, and that difference is very noticeable in a cup as simple and concentrated as moka pot coffee.
The AeroPress Filter Trick for Cleaner Coffee
One of the more useful moves you can borrow from outside the moka pot world: trim an AeroPress paper filter (or cut a disc to size) and lay it in the funnel before adding your grounds.
- Cut a round filter slightly smaller than your funnel’s diameter.
- Set it flat in the funnel before filling with coffee.
- Brew as usual.
This is a tested method and not a rumor. America’s Test Kitchen found that fitting a paper filter into the funnel cuts down on sediment noticeably, producing a cleaner cup than trying to jam a pour-over filter into the space.
- Pro: noticeably less grit at the bottom of your cup.
- Con: slightly less body, and one more small step before brewing.
It works across both 3-cup and 6-cup Bialetti-style pots without any modification.
Quick-Reference Cheat Sheet
Screenshot this and keep it near your stove.
- Starting grind: medium-fine, texture of fine sand or table salt.
- Target brew time: 4 to 6 minutes, heat to gurgle.
- Adjustment rule: move 1 to 2 clicks at a time, one variable per test.
- Bitter or harsh? Go coarser.
- Weak or watery? Go finer.
- Log each brew: setting, dose, heat, time, taste, in that order.
Why This Dial-In Method Holds Up
Testing this approach across different pots and beans confirms the same thing every time: the one-click rule beats guesswork because it isolates cause from effect. Most bad cups trace back to changing two things at once, heat and grind, or dose and grind, and never knowing which one mattered. Keep the changes small and singular, taste honestly, and the sweet spot usually shows up within three or four brews. For deeper background on what’s happening chemically once you nail the grind, Font-mag’s guide to coffee extraction is worth a read.
Better Beans Make Dialing In Easier
Here’s the honest math on where your effort pays off best: a great grind setting on stale, mediocre beans still tastes mediocre. Fresh, well-roasted coffee gives you a wider margin for error, and a specialty roast is often more impactful for cup quality than obsessing over your exact grinder click. Font-mag roasts in small batches, so what lands in your grinder hopper is closer to peak freshness than most bags sitting on a shelf.
If you’re starting your moka pot journey from scratch, browse Font-mag’s flavored coffee collection for beans that hold up well to stovetop brewing, and pick up a pack of AeroPress paper filters while you’re at it for the sediment trick above. Prefer decaf in the evening? Font-mag’s Downshift Decaf brews just as well in a moka pot as its caffeinated counterparts. Orders over $35 ship free, so it’s an easy way to stock up on both beans and accessories in one go. Place an order today and taste the difference fresh roasting makes in your next stovetop brew.
Frequently Asked Questions
What grind size is best for a moka pot? Medium-fine, similar to fine sand or table salt in texture. That’s finer than drip coffee but coarser than espresso, giving the moka’s steam pressure enough resistance without choking the flow.
Can I use a blade grinder for moka pot coffee? You can, but a burr grinder produces far more consistent results, since blade grinders create a mix of fine dust and larger chunks that extract unevenly in the same brew.
Why does my moka pot coffee taste bitter? Bitterness almost always points to a grind that’s too fine or a brew that ran past 7 to 8 minutes. Try going one or two clicks coarser and cutting the heat slightly.
How much coffee should I use for a 3-cup vs. 6-cup moka pot? A 3-cup pot typically takes 15 to 18 grams, while a 6-cup takes roughly 30 to 36 grams. Larger pots often need a slightly coarser grind to keep brew time in the 4 to 6 minute range.
Should I tamp the coffee in a moka pot? No. Tamping increases resistance beyond what a moka pot’s low-pressure brewing can handle safely, which can stall the flow or create uneven, bitter extraction.
Sources
- How to make better moka pot coffee | America’s Test Kitchen
- Moka Pot Grind Size: Complete Guide to Perfect | BrewedLate Coffee
- Moka Pot Grind Size: The Complete Extraction Science Guide
- Coffee Grinder for Moka Pot: Exact Settings That Work (2026) – InstaCuppa Store
- Do I need to use a tamp if using a Moka pot? (Coffee Stackexchange)